
OpenClaw常见问题

本文整理了OpenClaw使用过程中的高频问题与对应解决方法,涵盖WebUI显示异常、npm报错、安装故障、飞书/企业微信/钉钉等第三方平台配置、手动对接大模型,以及软件卸载、连接报错等各类场景。
一、OpenClaw WebUI显示Not Found
部分Windows 10用户启动WebUI后页面空白,仅提示Not Found,该问题多见于2026.2.21及后续版本,通过pnpm/npm安装时更易出现。
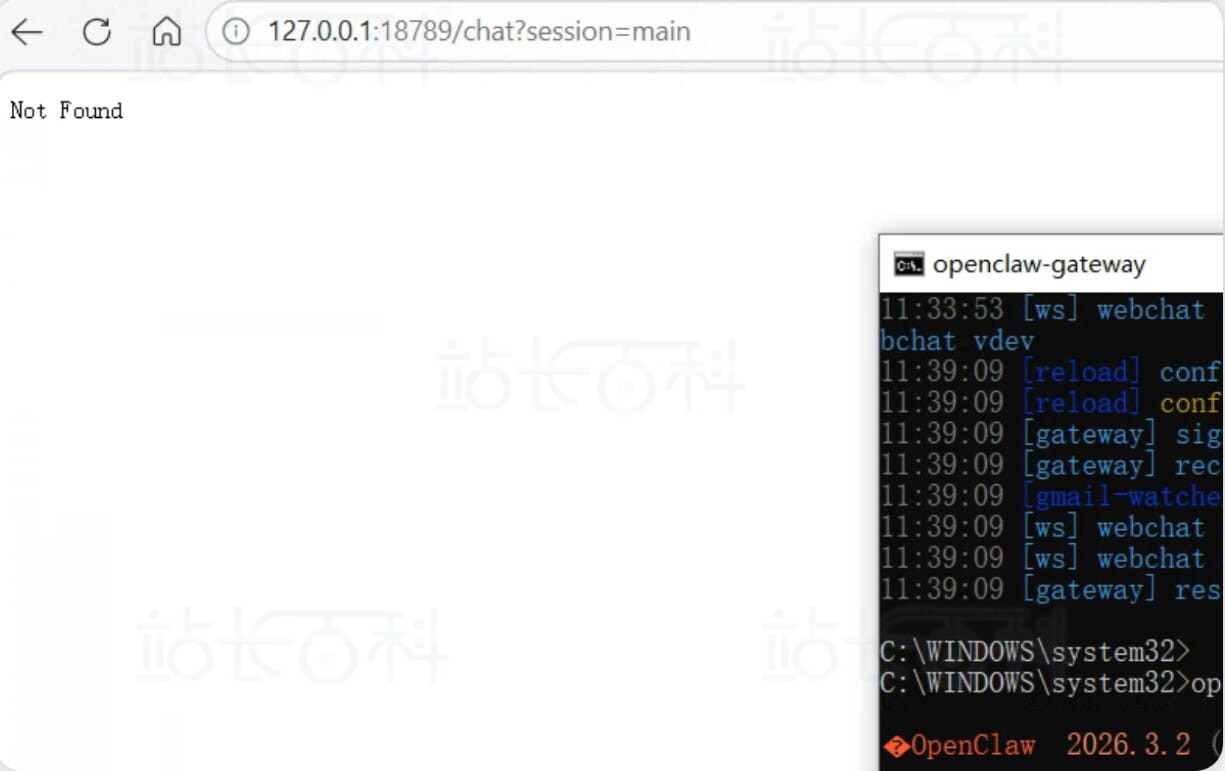
解决方法1、查询安装路径
在终端执行命令,定位OpenClaw安装位置:
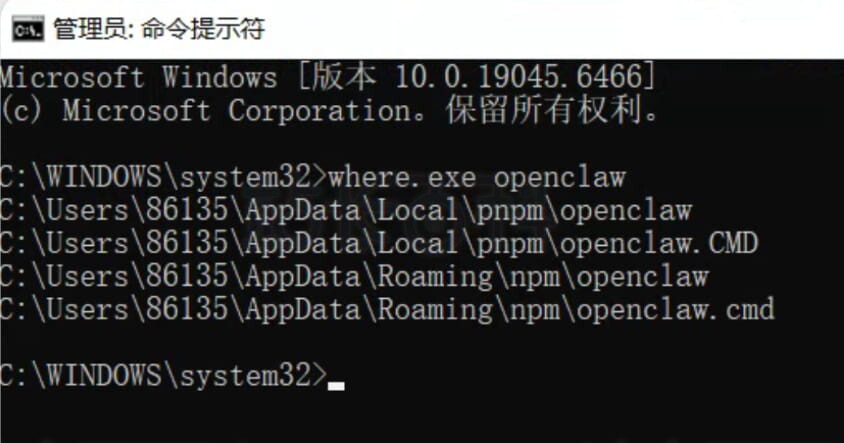
示例路径:C:\Users\你的用户名\AppData\Roaming\npm\node_modules\openclaw\dist\control-ui
解决方法2、手动指定WebUI路径
打开openclaw.json配置文件,在gateway节点下添加controlUi配置,手动绑定 WebUI 地址:
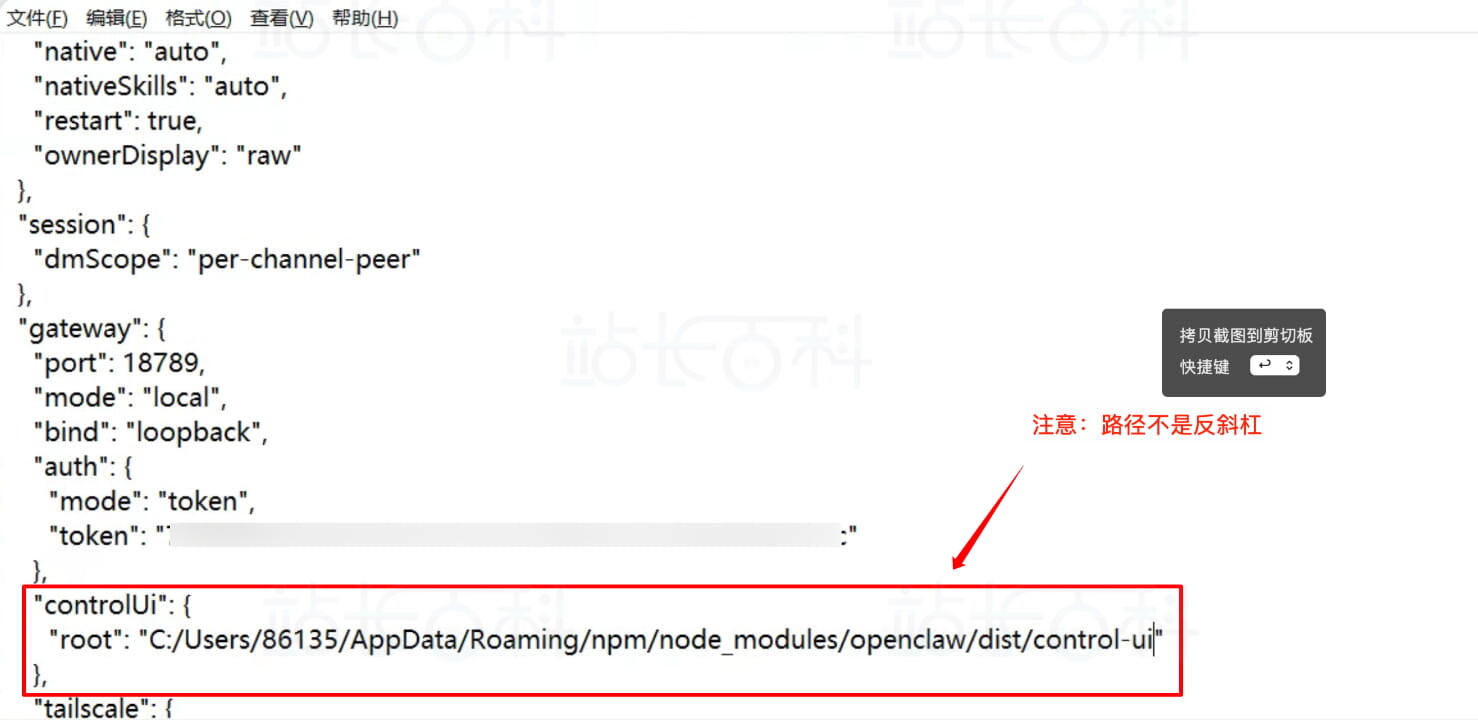
"controlUi": { "root": "C:/Users/86135/AppData/Roaming/npm/node_modules/openclaw/dist/control-ui" }
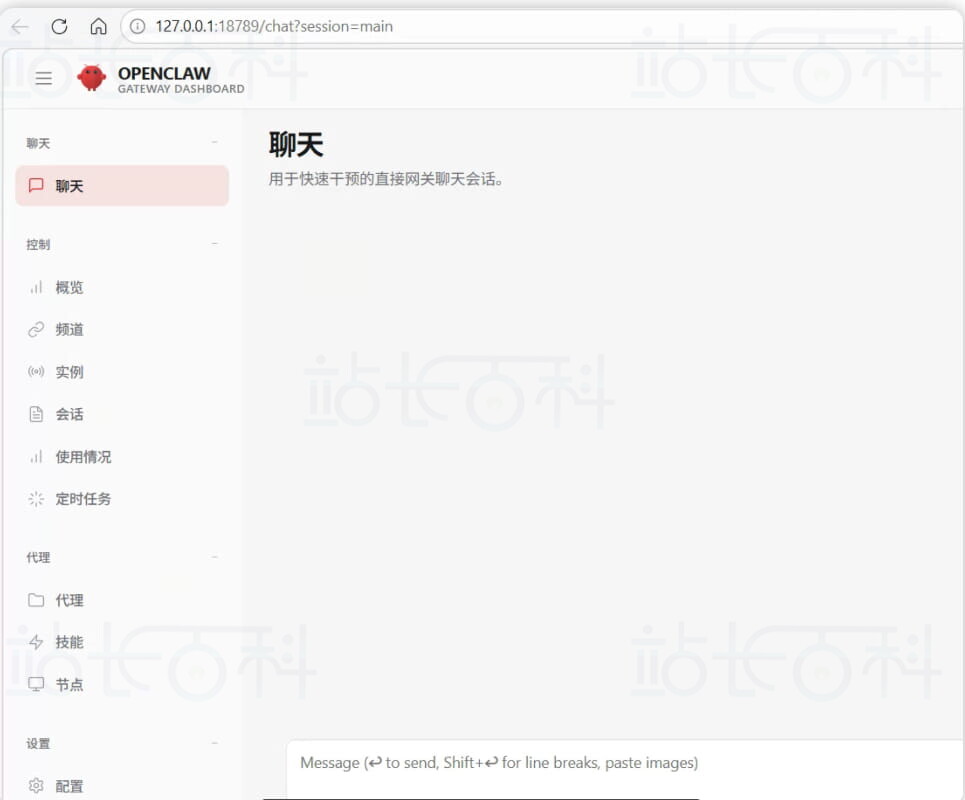
配置完成后即可正常访问。
二、npm error code 128报错解决
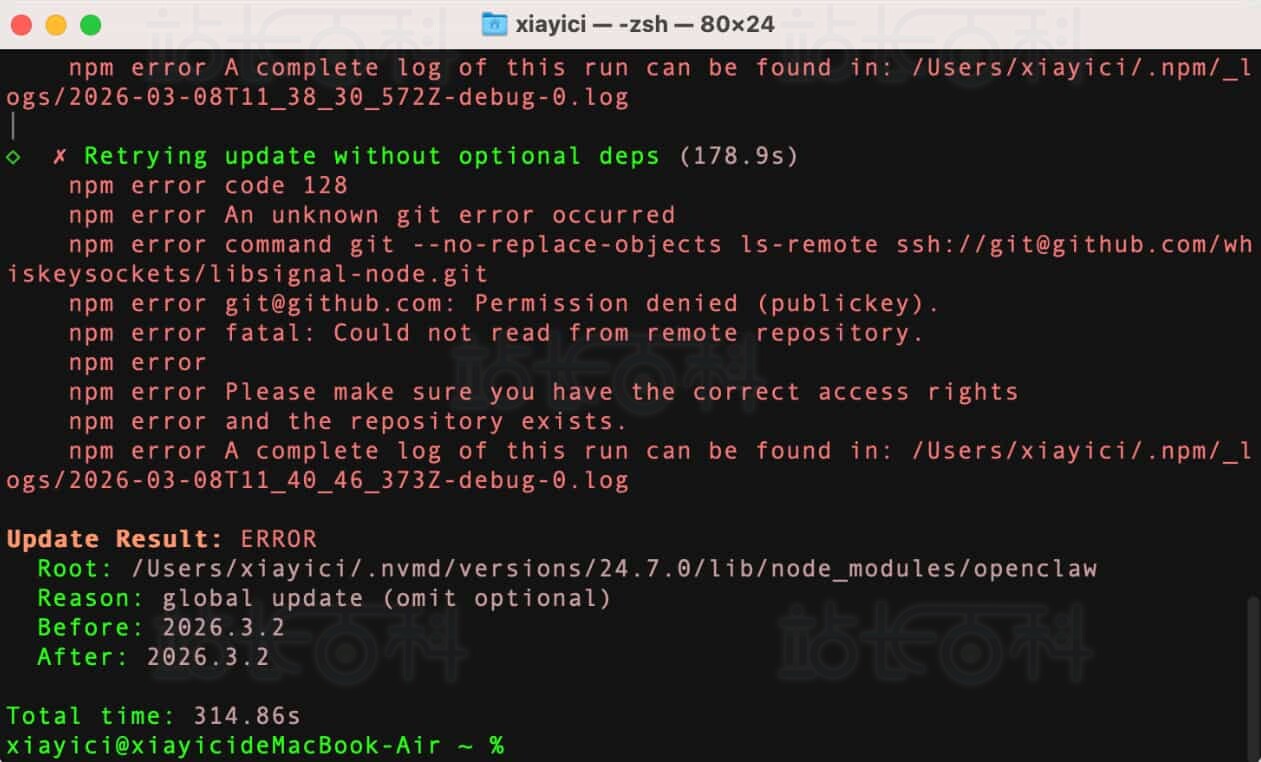
典型报错信息:
npm error code 128 npm error An unknown git error occurred npm error command git --no-replace-objects ls-remote ssh://git@github.com/whiskeysockets/libsignal-node.git npm error git@github.com: Permission denied (publickey). npm error fatal: Could not read from remote repository.
原因:Git 默认使用 SSH 协议拉取代码,权限验证失败。
解决方案:
执行命令将Git链接切换为HTTPS协议:
git config --global url."https://github.com/".insteadOf ssh://git@github.com/
三、Windows安装常见问题
官方一键安装命令:
iwr -useb https://openclaw.ai/install.ps1 | iex
报错 1:无法连接到远程服务器
原因:网络不支持直接访问官方域名,改用 npm 国内镜像安装:
npm install -g openclaw@latest --registry=https://registry.npmmirror.com
报错 2:npm error enoent/找不到git
npm error syscall spawn git npm error path git
原因:系统未安装Git环境,安装Git工具后即可解决。
报错 3:安装提示npm error code 1
先执行权限配置命令,再重试安装:
Set-ExecutionPolicy RemoteSigned -Scope CurrentUser Set-ExecutionPolicy -Scope Process -ExecutionPolicy Bypass
报错 4:GPU相关安装失败
禁用 GPU 依赖后安装:
$env:NODE_LLAMA_CPP_GPU = "false" npm install -g openclaw@latest
跳过本地大模型安装(推荐)
声明跳过本地模型依赖下载
$env:NODE_LLAMA_CPP_SKIP_DOWNLOAD="true"
配合国内镜像用 pnpm 安装
pnpm add -g openclaw@latest --registry=https://registry.npmmirror.com
Git代理配置
git config --global http.proxy http://ddns.feiwow.com:20172 git config --global https.proxy http://ddns.feiwow.com:20172
pnpm相关配置
安装指定版本npm与pnpm
npm install -g npm@11.10.1 npm install -g pnpmWindows pnpm setup
执行pnpm setup后重启终端,避免安装过程中断。
Mac pnpm setup plaintextsource ~/.zshrc # zsh 环境
# 或
source ~/.bash_profile # bash 环境pnpm 安装 OpenClaw
plaintextpnpm add -g openclaw@latest
四、Mac系统安装常见问题
官方一键安装命令:
curl -fsSL https://openclaw.ai/install.sh | bash
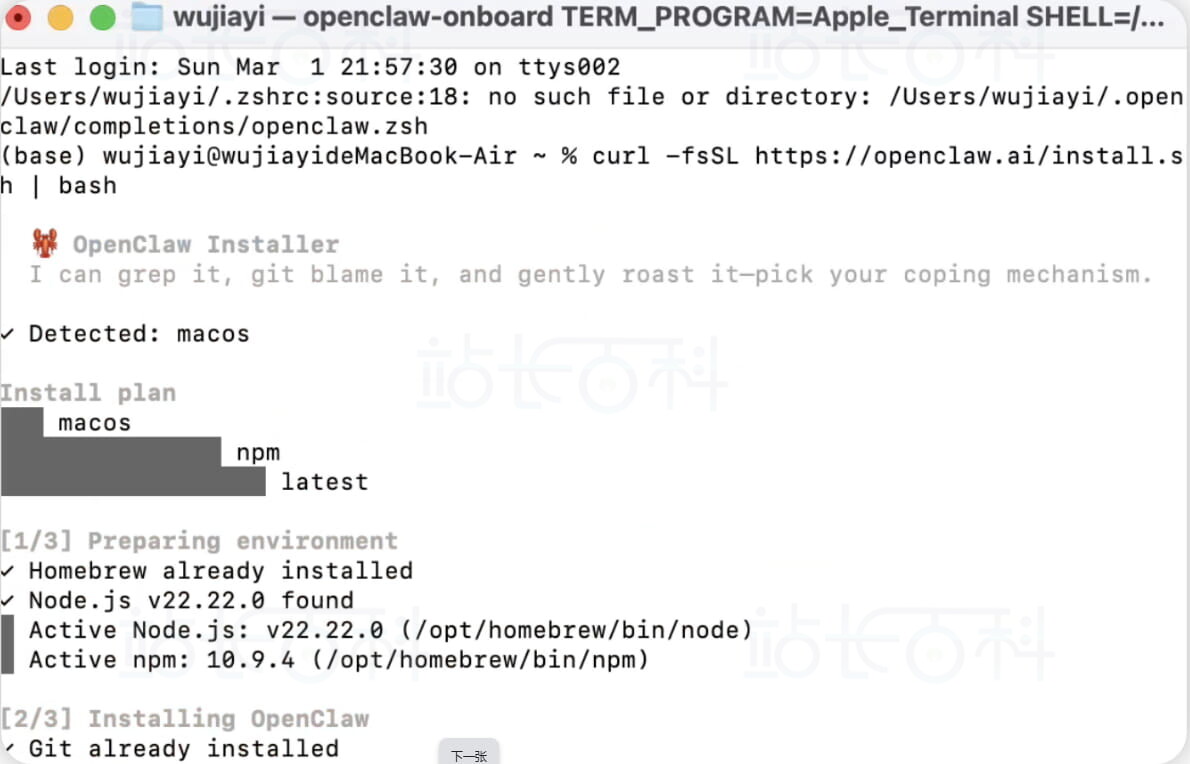
等待下载完成后,按引导完成初始化,选择QuickStart快速配置即可。
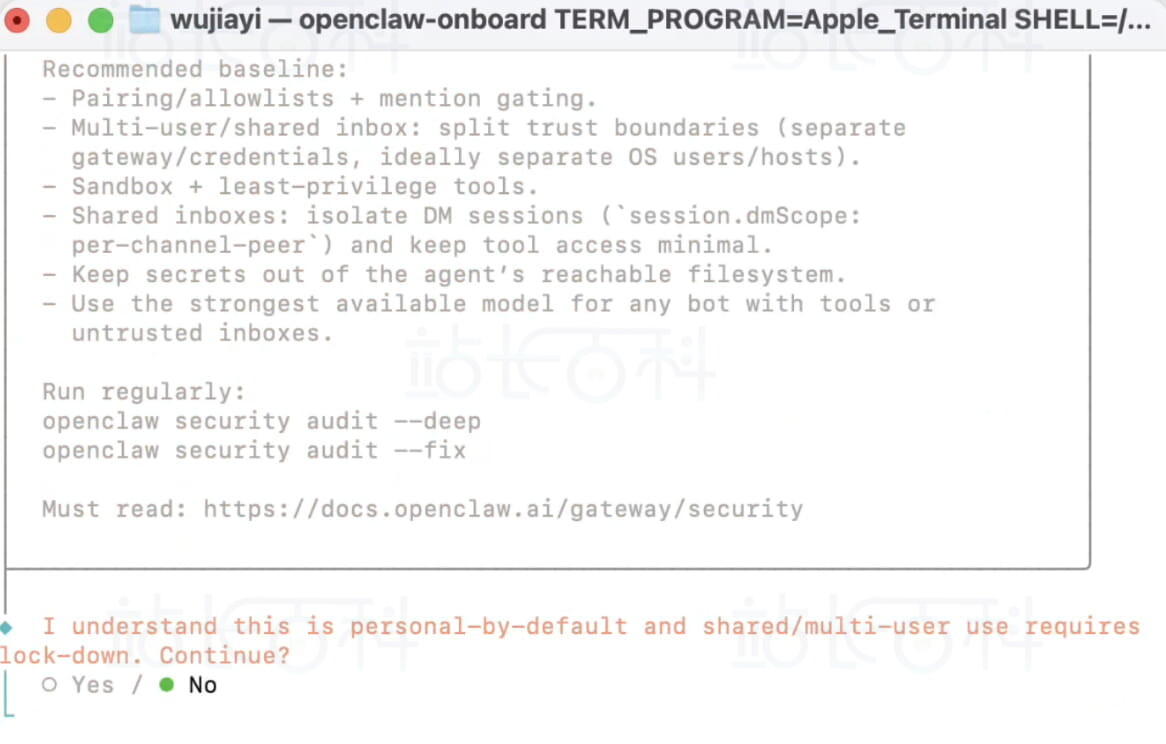
I understand this is personal-by-default and shared/multi-user use requires lock-down. Continue? │ Yes │ ◆ Onboarding mode │ ● QuickStart (Configure details later via openclaw configure.) │ ○ Manual
在配置文件中添加飞书节点:
"feishu": { "enabled": true, "appId": "cli_a92e85788578dcd5", "appSecret": "WincPA9hJbEoAuOiq7iygfp378xQbZCV", "domain": "feishu", "dmPolicy": "open", "allowFrom": ["*"], "groupPolicy": "disabled" }
修改文件后,必须让 Gateway 重新加载配置:
# 方法1:重启 Gateway(最可靠) openclaw gateway restart# 方法2:热重载(如果支持)
openclaw gateway reload
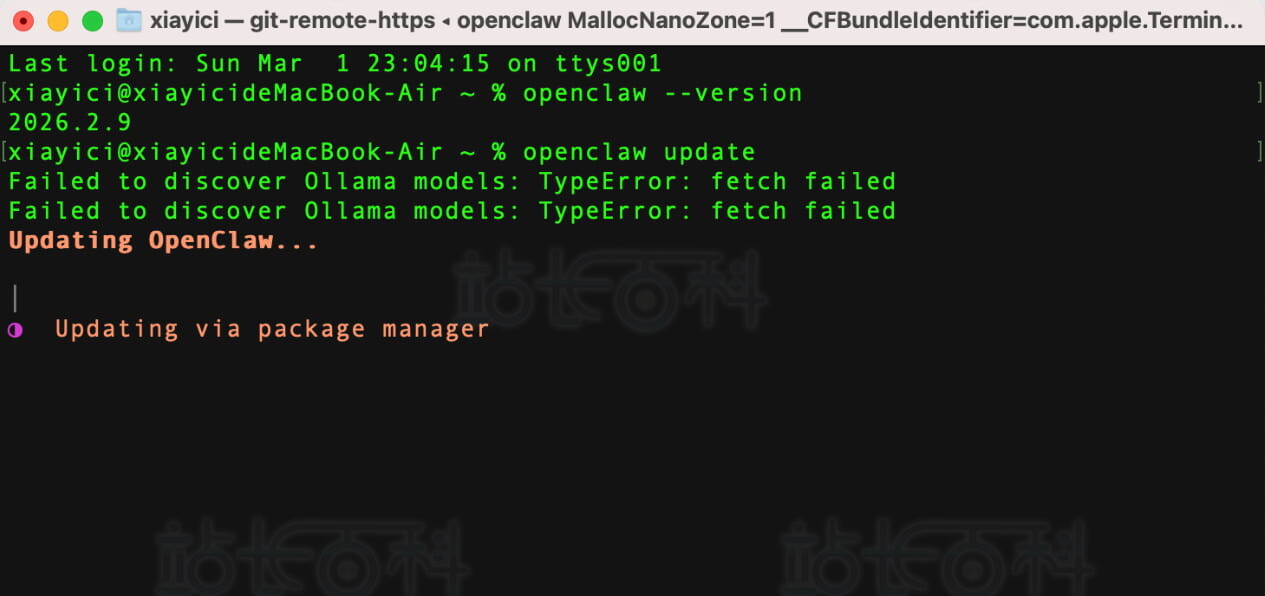
更新飞书:
五、配置飞书常见问题
飞书开放平台添加以下权限:
{ "scopes": { "tenant": [ "aily:file:read", "aily:file:write", "application:application.app_message_stats.overview:readonly", "application:application:self_manage", "application:bot.menu:write", "cardkit:card:write", "contact:user.employee_id:readonly", "corehr:file:download", "docs:document.content:read", "event:ip_list", "im:chat", "im:chat.access_event.bot_p2p_chat:read", "im:chat.members:bot_access", "im:message", "im:message.group_at_msg:readonly", "im:message.group_msg", "im:message.p2p_msg:readonly", "im:message:readonly", "im:message:send_as_bot", "im:resource", "sheets:spreadsheet", "wiki:wiki:readonly" ], "user": ["aily:file:read", "aily:file:write", "im:chat.access_event.bot_p2p_chat:read"] } }
事件与配对
添加事件:im.message.receive_v1(接收消息)机器人返回配对码后,执行批准命令:
openclaw pairing approve feishu <配对码>
插件启用
openclaw plugins list # 查看插件列表 openclaw plugins enable feishu # 启用飞书插件 openclaw channels add # 添加通道
打开~/.openclaw/openclaw.json,在models下的providers中添加大模型配置(原有models直接追加,无则新建):
{ "models": { "providers": { "英伟达nvidia": { "baseUrl": "https://integrate.api.nvidia.com/v1", "apiKey": "nvapi-HxKN8Zp2-xxxxx-替换成你的key", "api": "openai-completions", "models": [ { "id": "moonshotai/kimi-k2.5", "name": "moonshotai/kimi-k2.5", "reasoning": false, "input": ["image", "text"], "cost": { "input": 0, "output": 0, "cacheRead": 0, "cacheWrite": 0 }, "contextWindow": 200000, "maxTokens": 8192 } ] } } } }
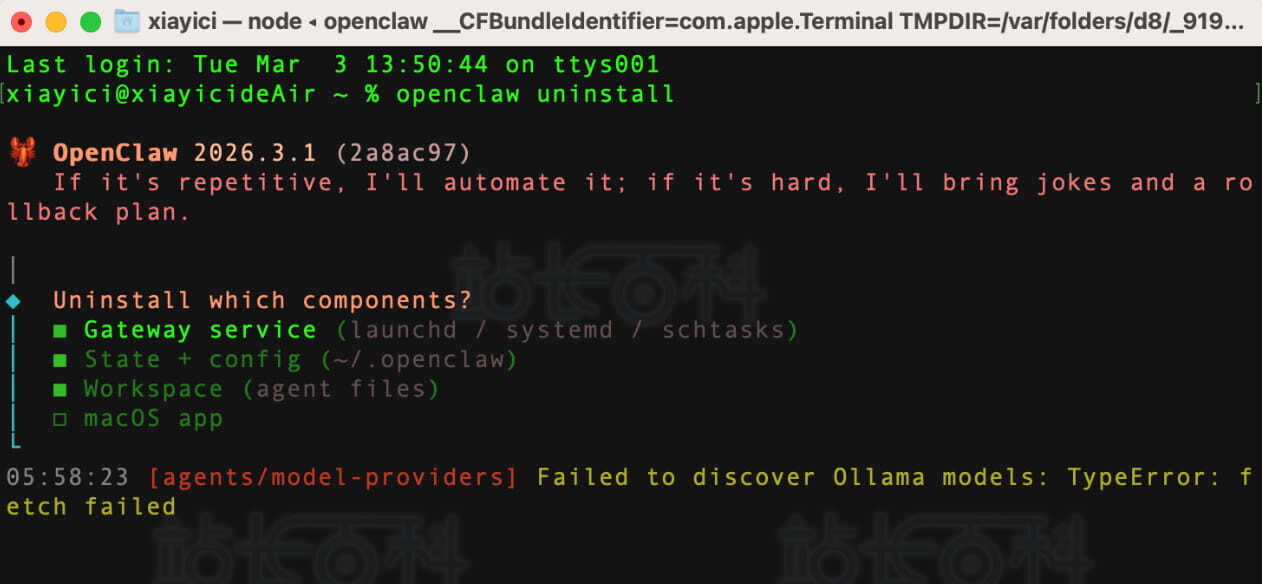
按照界面提示步骤完成卸载操作即可。
六、Disconnect 1006报错解决
终端执行命令:
openclaw dashboard

广告合作

QQ群号:4114653
温馨提示:
- 本网站发布的内容(图片、视频和文字)以原创、转载和分享网络内容为主,如果涉及侵权请尽快告知,我们将会在第一时间删除。邮箱:2942802716#qq.com(#改为@)。
- 本站原创内容未经允许不得转裁,转载请注明出处“站长百科”和原文地址。